6 Ways to Fix Sleep Mode Not Working on Windows 11
The “sleep mode” option is useful for leaving a computer or laptop for a short period of time, such as when you go out to lunch. In this post, you’ll get a solution to fix Sleep Mode Not working on Windows 11. When your computer is in sleep mode, it is not completely turned off, but it is also not actively processing anything. When you put your computer to sleep, it won’t actually shut down, so you can pick up right where you left off without losing any of your work.
However, several users have reported having troubles with Sleep Mode not working on Windows 11. If you, too, have been experiencing this problem, this post is for you. If Sleep Mode in Windows 11 is malfunctioning, read on for some solutions.
Fix Sleep Mode Not Working on Windows 11
Sleep mode not functioning in Windows 11 may be fixed in a number of ways, including-
1) First, turn off Fast Startup.
You may have this issue owing to the rapid startup being enabled. This might be caused by Fast Startup, which speeds up the boot process but could also prevent your computer from entering sleep mode. To determine if this problem persists after disabling quick startup, you should –
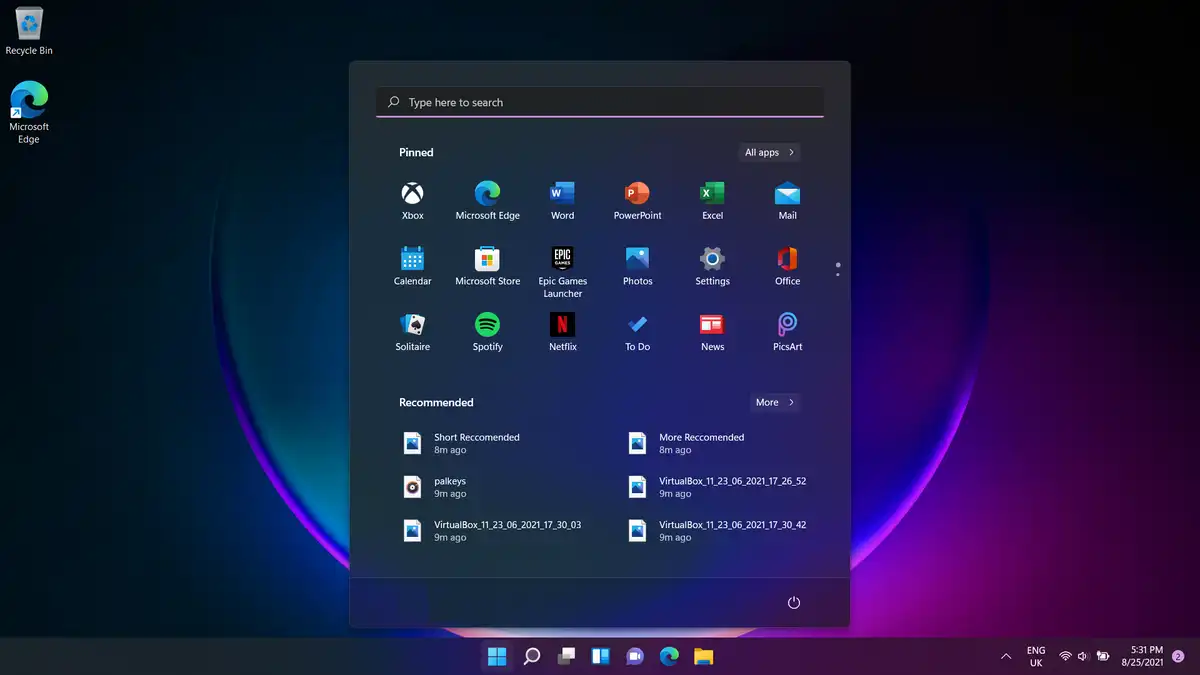
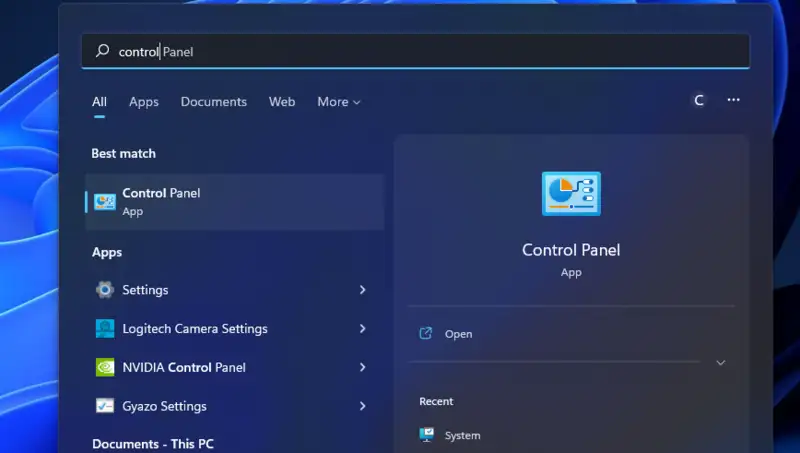
- Find the Control Panel menu by searching the Start menu
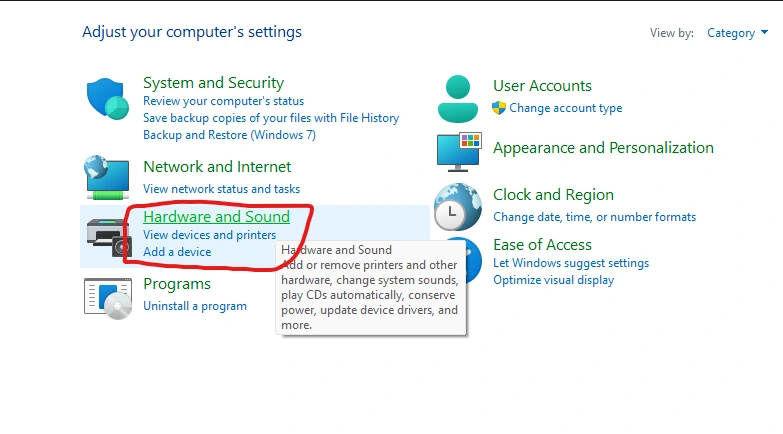
- Here, click on the Hardware and Sounds tab, and then click on the Power Options.
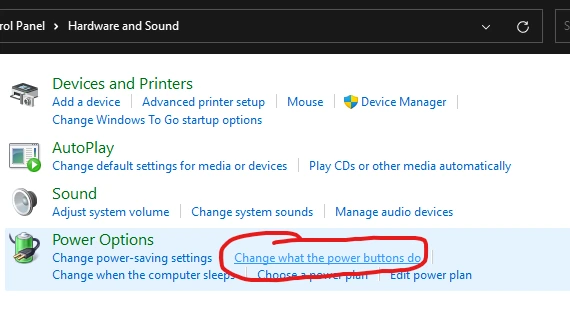
- Select the option that says “Choose what the power button do” on the sidebar.
- Then, select the option ‘Change unavailable settings that are currently unavailable’ in the following box.
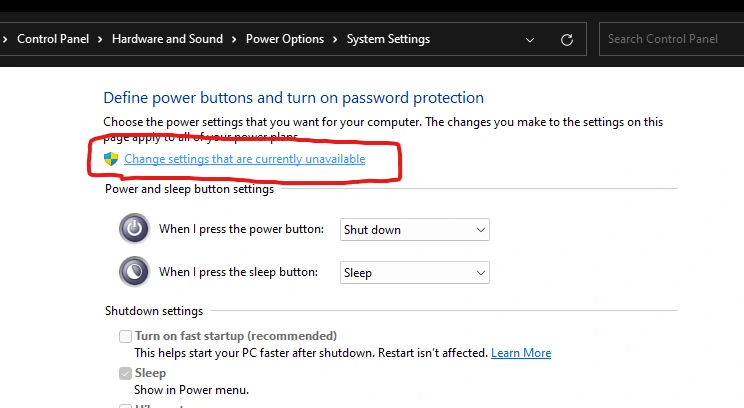
- Finally, to turn off a fast startup, deselect the option labelled Turn on fast startup.
- Make sure you save your changes by selecting that option.
Also Read: 12 Essential Windows Keyboard Shortcuts
2) Turn on the sleep mode
There should be no unintentional disabling of sleep mode on the user’s part. This may be the cause of Windows 11’s sleep mode malfunction. In such a situation, investigate the Windows 11 display and hibernation options. Here are the measures to take:
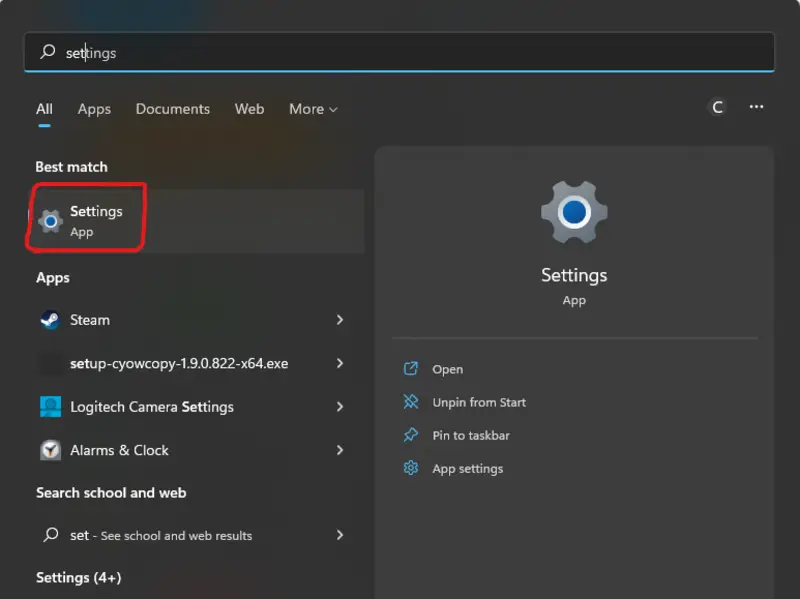
- Find the Settings menu by searching the Start menu
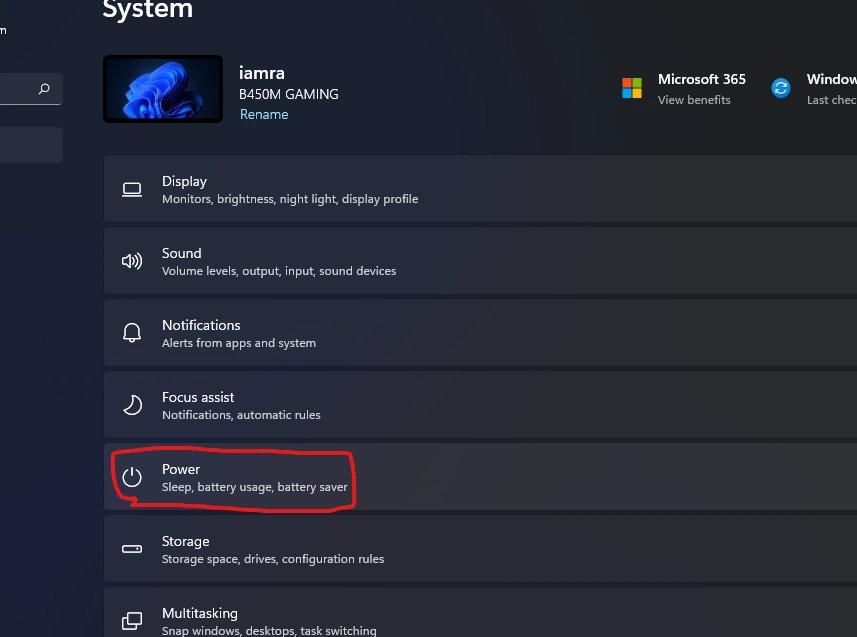
- Select the Power and Battery option under the System menu.
- Then, expand the Screen and sleep tab by clicking there.
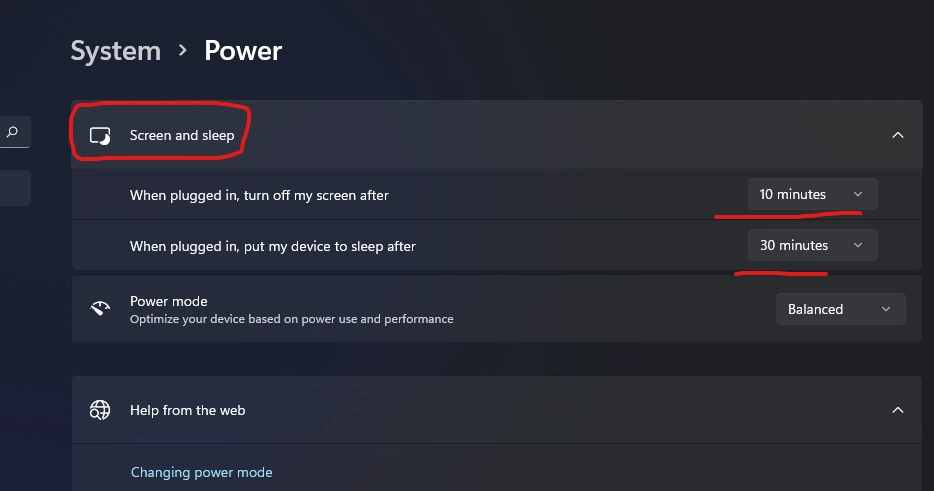
- Set Time for the computer to go to sleep now.
- You may exit the Settings app once you’ve finished making adjustments.
Also Read: 8 Best Video Editing Software For Windows 11
3) Turn off the mouse and network and wake up on the computer.
This may occur if you attach a mouse or any other type of device to your computer that causes it to wake up from hibernation. Fixing the problem will need you to adjust these settings. Below are some instructions for doing just that:
- For the Device Manager, use the Windows key + X to open it directly.
- To open the Mice and other pointing devices sub-section, double-click on it.
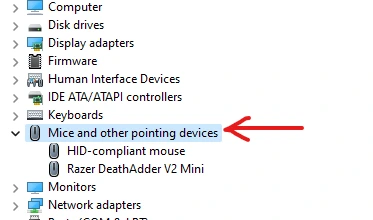
- Then, pick Properties from the context menu of your HID-compliant mouse.
- Remove the tick from the box labelled “Allow this device to wake the computer” under the Power Management section. The next step is to choose the OK button.
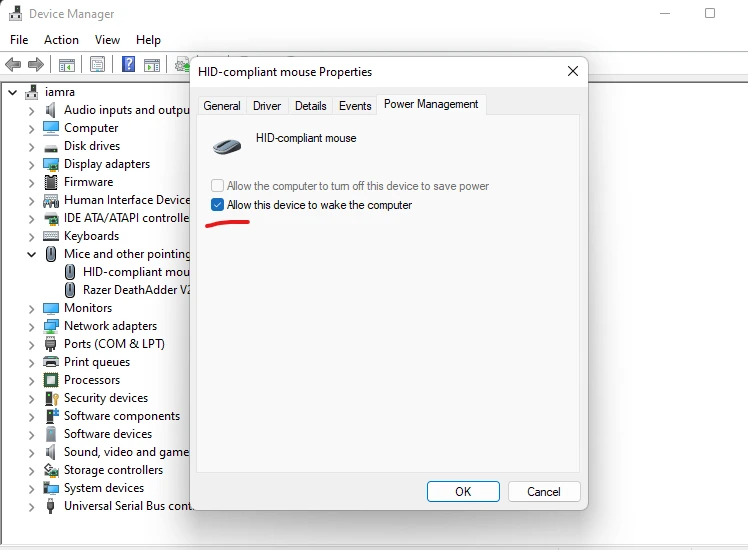
- To configure the Network adapter, repeat the procedures outlined above.
4) Close Unwanted Applications or Programs
There are occasions when your computer won’t enter sleep mode because of all the running programmes in the background. In this case, you will need to use the command prompt to locate the offending programmes before terminating them one by one. Here are the measures to take:
- The Windows terminal (Admin) may be accessed by pressing Windows + X.
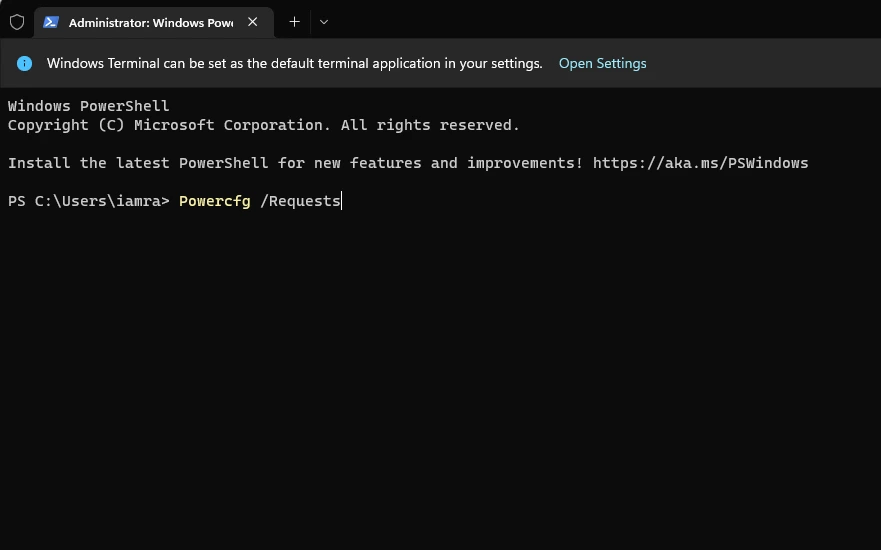
- Use the Windows Search feature to look for the Terminal.
- To proceed, please run: Powercfg /Requests
- If your computer won’t go to sleep, you may need to close some of the applications below.
5) Use the PowerTroubleshooter
The sleep mode and power problems are diagnosed by the troubleshooter and corrected. To use the power troubleshooter, please follow these instructions:
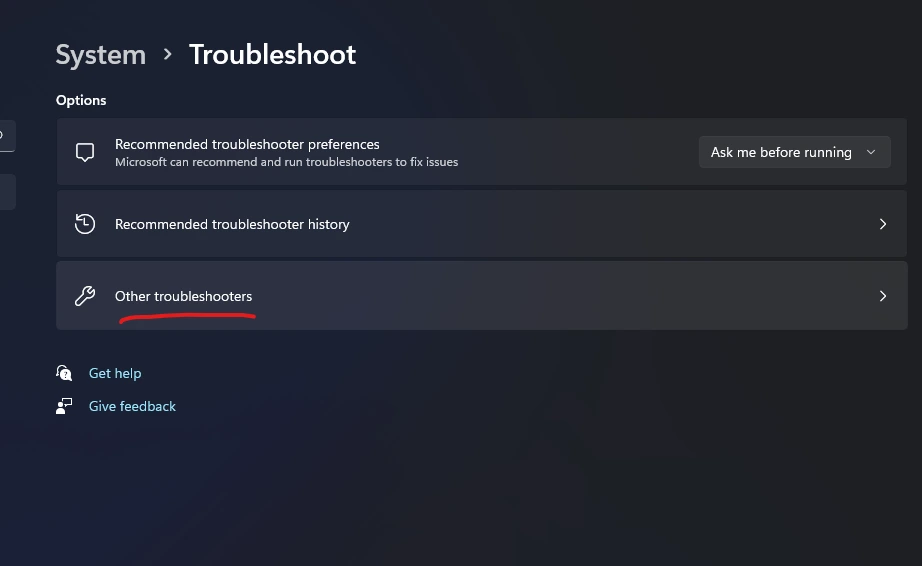
- Find the Troubleshooter options in the Start menu and click on them to access the settings.
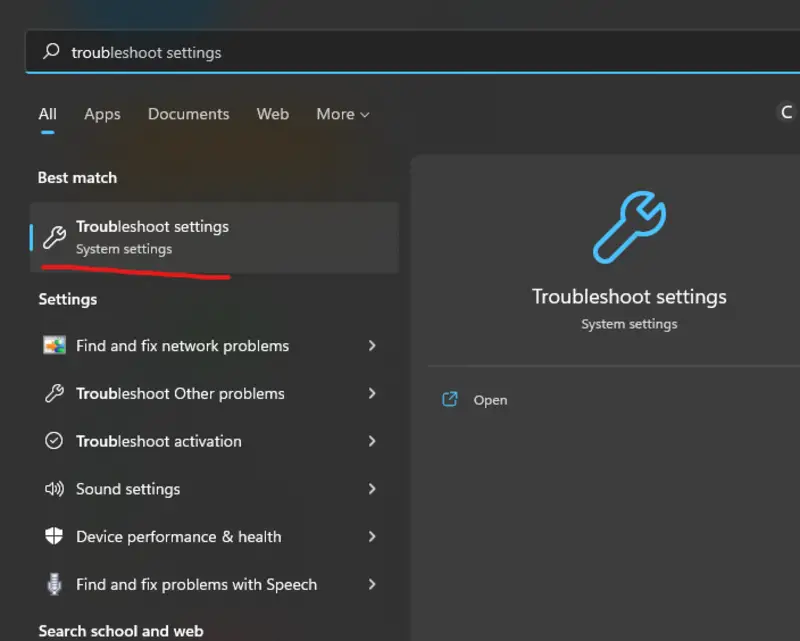
- Choose the Other Troubleshooters menu there.
- When you find the Power menu option, choose it and then hit the “Run” button.
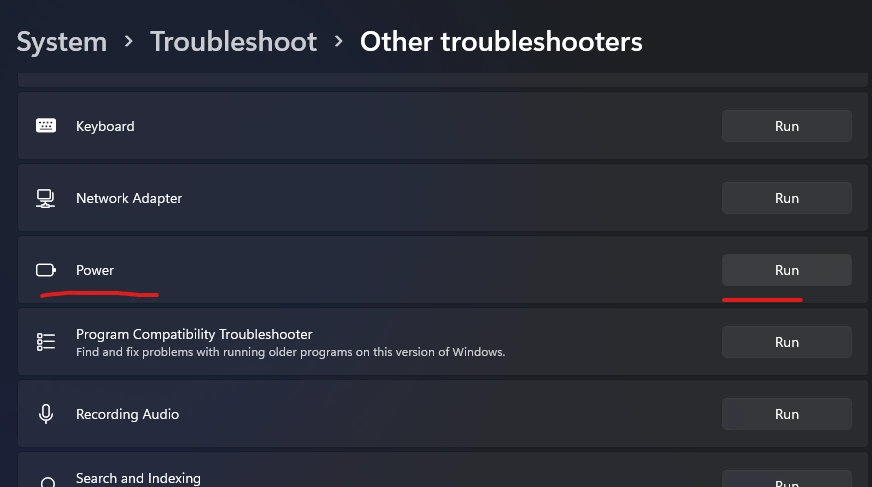
- Currently, the problem may be fixed by following the on-screen directions.
6) Alter Your Energy Choices
Changing the power settings is another possibility. Here are the actions you need to take to change the power settings:
- To open the Control panel, hit the Windows key + R. Just hit the enter key, and the Settings menu will pop up. Determine where the settings menu is located.
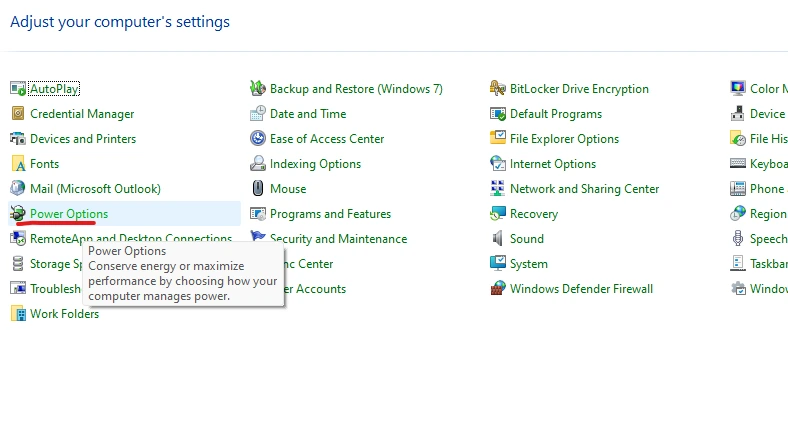
- Here, you should look for the Power menu item and choose it.
- To adjust your plan settings, select that option.
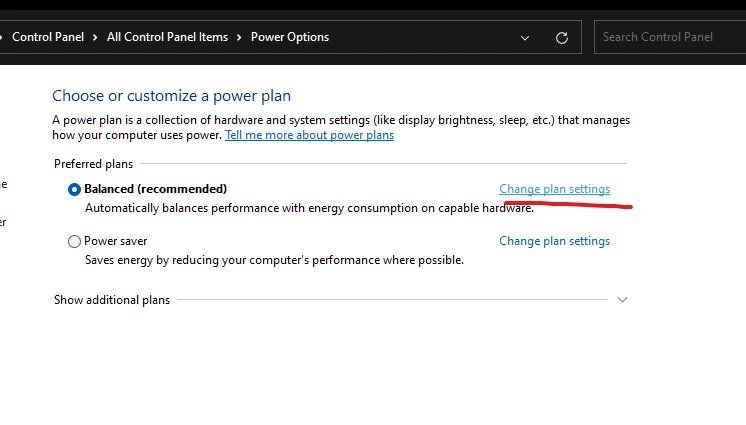
- Next, select the option to “Change advanced power settings.”
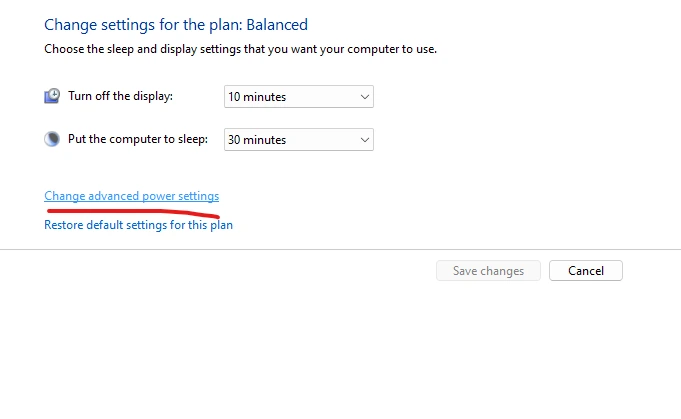
- To do so, double-click the Sleep option in the Power Options pane that just appeared.
- Next, double-click the option called “Allow Wake Times” to make it expand.
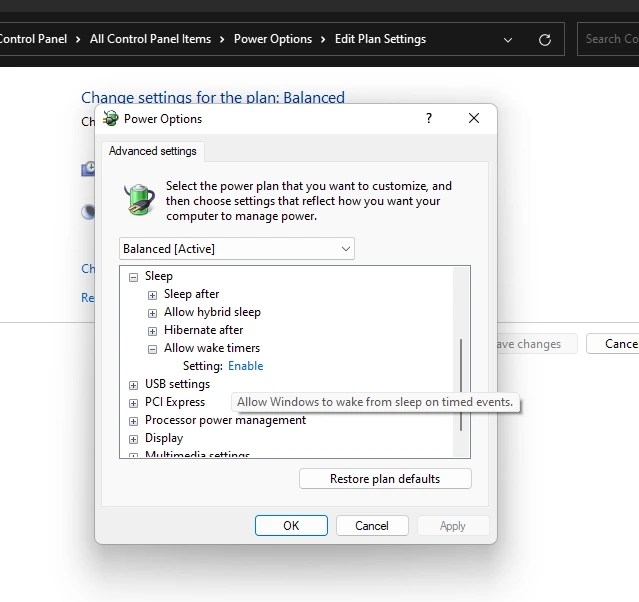
- You may disable it when it’s on battery or while it’s plugged in.
- Finally, choose to Apply to commit your new settings.
- If you want to use the Hybrid Sleep functions, the procedure is the same.
Conclusion
If sleep mode stops responding on your Windows 11 PC, try some of the solutions provided in the above article. If Sleep Mode stops working in Windows 11 and you follow the methods above, you can get it working again.

